So far in this series, I have discussed scope selection and mounting, zeroing, and how to choose the right ammunition for a new rifle. Here, in the third and final installment, I will describe how I break in a new barrel and perform routine cleaning.
From my perspective, there is no more unsettled area in the world of rifle shooting than whether performing break-in of a new barrel is worth all of the effort. An associated factor is that everyone’s cleaning process seems to differ, sometimes dramatically. I don’t have the answers. All I can do is describe how I do things. The process seems to have worked well for me through the years, and I’ve learned it from some of the best riflemen around.From my perspective, there is no more unsettled area in the world of rifle shooting than whether performing break-in of a new barrel is worth all of the effort.
Breaking in a new barrel is something I dread. It is brutal, arduous work that always seems to arise in the middle of the summer when the temperature near the concrete shooting platforms of the average outdoor range hovers around 120 degrees.
It takes hours to complete, but I have convinced myself that the effort is justified. Maybe it’s more that I know beyond any doubt that it causes no harm, and there is a strong chance that it does good things for a rifle that may be used for the next couple hundred years. At the least, I really do believe that it makes future cleaning sessions much easier and shorter.
Generally speaking, the break-in process is intended to help remove some of the minor imperfections associated with the rifling of a barrel. The idea is to fire bullets down a clean barrel multiple times in order to eliminate burs and other types of flaws from the manufacturing process that could affect accuracy or cause copper fouling to accumulate at certain points along the bore if allowed to persist. Imagining that each bullet is further “polishing” the bore is not a bad way to look at it.
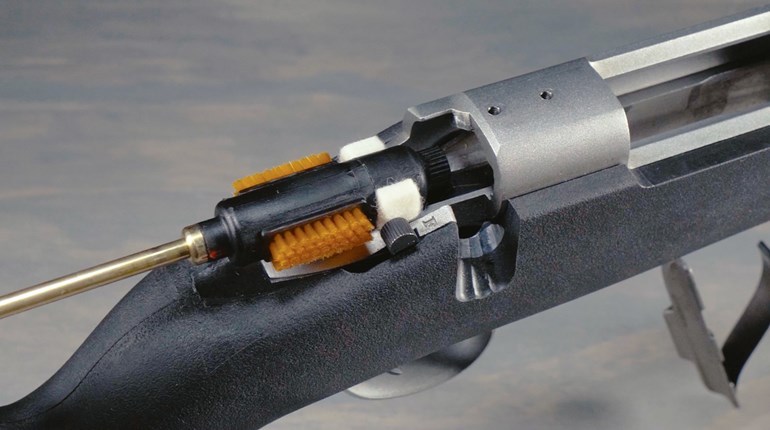
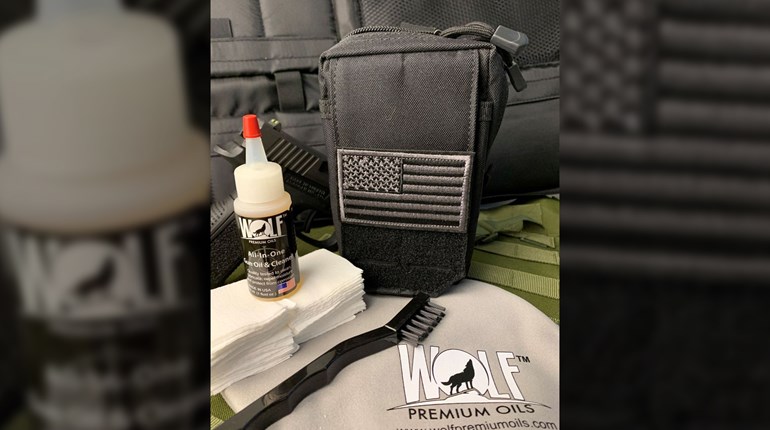
The items used for break-in are the same ones I use for all routine cleaning work. They include a rifle rest, a one-piece cleaning rod that is of a diameter relatively close to the caliber of rifle I am cleaning, a bore guide, powder solvent, copper solvent, cotton flannel patches, and a brush and jag for the rod.
Here is my step-by-step process, using the various products I have found to work particularly well:
- Fire a single shot;
- Place the unloaded rifle securely in a cradle or rest (Tipton Gun Vise);
- Remove the bolt and insert the proper bore guide (Possum Hollow) for the rifle;
- Using a bronze or nylon brush with powder solvent (Hoppe’s Elite) on it, make 10 complete passes over the length of the barrel;
- Remove the brush and replace with a jag (Tipton Ultra Nickel Plated) that fits the bore;
- Soak a patch with more powder solvent and make another 10 passes through the bore (note that each pass should be stopped just before the jag exits the muzzle in order to keep the patch on the jag);
- Repeat the previous step with additional patches until a patch with very little black or gray color is removed from the jag;
- Place a dry patch on the jag and pass it through the bore a few times;
- Apply a modest amount of good copper solvent (Bore Tech) to a patch, fit it on the jag and make 10 passes in the same manner as with the powder solvent;
- Remove the patch and repeat the previous step with other patches until one finishes with no blue or green coloring on it whatsoever (the color indicates that copper is still in the bore and is being removed);
- Place a dry patch on the jag and pass it through the bore a few times.
After running this last dry patch, the rifle is ready to be fired again. Repeat the meticulous cleaning process after each shot for a total of 10 shots. Then repeat the process after every two shots for the next 10 shots. Finally, fire three five-shot groups while cleaning after each group is completed.
In my experience, the rifle becomes progressively easier to clean as the bore condition improves as a result of this process. This might be me trying to be positive and believe that what I’m doing is making a difference, but I don’t think so. If I could find a good excuse not to perform barrel break-in, I would. I was certainly able to find many good reasons not to clean my room as a kid.
The process of cleaning between shots that I describe is the same process I routinely use when I return home from a day at the range. I opt to regularly clean my rifles, but there are some outstanding shooters and technicians I hold in great esteem who have decided to clean only powder residue from their bores from time to time. They leave the copper for hundreds of rounds before performing a full, deep cleaning.
While they just might be getting a little lazy at their more advanced age, they rightfully understand that the point of impact shifts from a clean bore to a properly fouled one. That is one reason none of us should ever go out hunting with a perfectly clean bore, especially if we expect that a shot might be out past 200 yards or so. My friends simply got tired of having to fire 10 to 20 “fouling” shots every time they hit the range or field in order to return the point of impact to where they expected it to be. They also have not seen any degradation of accuracy from copper in their bores. If I could find a good excuse not to perform barrel break-in, I would. I was certainly able to find many good reasons not to clean my room as a kid.
It should be noted that the barrels they use are of the highest quality the world has to offer. The story is likely different for the ones attached to most rifles found in the gun shop down the street. In my experience, it most certainly is. I have seen accuracy and performance drop off dramatically after high round counts and subsequent heavy copper fouling in standard production rifles.
There are some things to keep in mind when cleaning rifles. Using bronze brushes and jags with copper solvent will often create false positives with regard to producing blue or green patches and residue. This is because the copper solvent reacts with the bronze in the same way it does the copper deposited in the bore. I most often use nickel-coated jags and nylon brushes in the final cleaning steps to eliminate this. If I see blue or green at the end of a cleaning cycle with these, I know I have more copper to remove.
Some will argue the point, but I believe using a bore guide is essential for the prevention of harm to the rifle’s chamber and bore throat. This is harm that would otherwise result from an unguided cleaning rod banging off of these areas with each and every pass of a brush or jag. Without dispute, a guide is important in the effort to keep solvents from migrating into trigger mechanisms and other places that may cause real problems at important times. The horror stories are many.
With regard to barrel break-in and cleaning, I will never claim my way is the only way—but it is a way that has worked for me. As a general rule, I do clean my rifles after every shooting session, knowing that I should fire several “fouling” shots before I get too serious with it the next time. In light of what my most technical friends have found, I will attribute this to my Type-A personality. I also believe that I shouldn’t try to fix what isn’t broken.
It is my hope that this three-part series is helpful to proud owners of new hunting rifles, especially those who are relatively new to gun ownership in general. The last thing I want is for good people to be discouraged from making a gun purchase because of intimidation due to lack of knowledge or information. More guns in good hands make the world a better place.


