In theory at least, our reloading journey has progressed from spent brass back to mechanically sound cases with new primers installed. Depending on where you fall between mere fastidiousness and outright OCD, these may be cosmetically perfect, headstamp-sorted lots, or a soup-to-nuts combine with the only sure commonality a single caliber matched to your dies.
Either way, reassembly with the goal of cost savings and better performance—in the sense of being well matched to what you want to accomplish with your firearm—is solidly under way. Our Step Four (of seven) is next: Flaring the case mouth to accept a powder charge and new projectile.
In many respects, flaring is the easiest of all the steps in the reloading process. For openers, it’s likely the one that requires the least precision—though rifle guys may rightly raise an eyebrow to that (we’ll come back to “why” shortly). The somewhat loose nature of these tolerances stems from the fact that Step Seven moderates a bunch of the variations that can occur here.
In many respects, flaring is the easiest of all the steps in the reloading process.The nuts and bolts are both elementary and easy to adjust. In flaring, the tool consists of a pilot slightly smaller than internal case diameter that guides a gently sloped shoulder further into the case mouth. If you envision a shallow, 360-degree wedge, that’s it precisely. The function of the wedge is to “bell” the mouth of the case slightly more open than bullet caliber.
Belling has two purposes—one mostly of convenience, the other of necessity. The “convenience” element is generally used first. In Step Five—when powder re-charge occurs—the slightly wider, slightly funnel-shaped case mouth is an easier, tidier target for loading the propellant.
Bullet seating (Step Six) is where the importance of flaring/belling becomes somewhat more crucial. The mechanical integrity of a finished cartridge depends on relatively tight tension between the case and the bullet, and is important for reasons both obvious and less so. Field necessities are of the overt sort: Handling cannot always be gentle, so cartridges must be able to resist many sources and types of physical deformation. Such general sturdiness also preserves the internal, relatively contaminant-free environment for proper combustion of powder and the generation of the gas volume/pressure to propel the projectile.
One possible deformation is particularly troublesome, even dangerous—bullet setback. We’ve touched on this before, and its less obvious nature belies the trouble it can foment. For instance, in any round that is fed (auto-loading pistols and virtually any magazine-fed rifle), overall length (OAL) of the cartridge must be maintained for the feeding process to work at all. If an inevitable collision changes OAL by seating the bullet deeper, a malfunction is the very probable result.
Another rare but serious variation on bullet setback and reduced OAL can be worse—considerably in some cases—than mis-feeding. If a round with a too-deep bullet gets through the rest of your QC, and if it feeds and seats, combustion volume inside the case can be reduced to the point where the resulting burn is over-pressure. If this summons visions of badly shaken nerves and damage to the gun, you’re right, so to speak, on target.
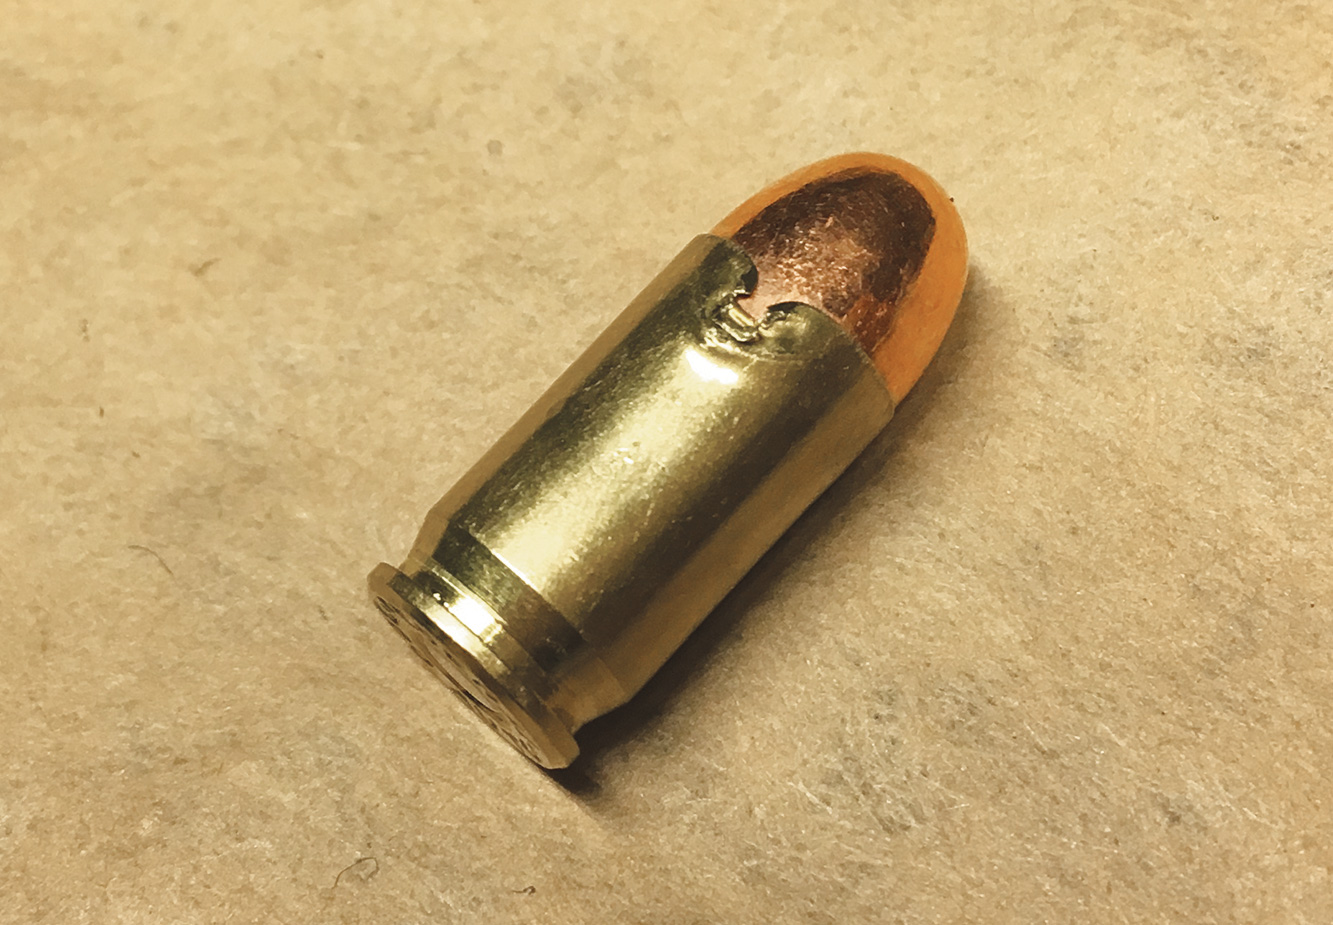
Round-nosed bullets are less sensitive to setback in general, and for obvious reasons: Collision forces are distributed better by such geometries and make critical deformations of the projectile less likely. As a consequence, they’re less inclined to rob the feeding process of needed energy that either flatish or sharp-nosed bullets may actually concentrate. But with any bullet profile, when the energy loss and misshaping rise above a certain level, they’ll combine to bring functioning to an irritating halt.
Proper flaring (.012-.018” over the nominal re-sized case outer diameter) can substantially reduce these problems in two ways, both of which have to do with “working” the brass at the case mouth. Over-flaring (too much bell) works more of the brass near the case’s end, and works it harder. While a frank split will usually be spotted with inspection (recycle that bad boy) during a pre-sort or prior to re-sizing, micro splits still exist. Proper flaring keeps these shallower and smaller in number, resulting in greater net brass integrity and life. There is also more uniform, uncompromised surface area for case-to-bullet static frictional forces that make and keep a finished cartridge sturdy.
This is often referred to as “neck tension” (especially in rifle reloading), and has other implications that are a bit beyond our scope. Suffice it to say that nit-picking consistency here can have surprisingly beneficial effects on accuracy. For our purposes, we want it to be consistent.
At the extreme, over-flaring will also make taking the flare out (Step Seven–Crimping) difficult. At some point, over-flares will even exceed crimp die dimensions; such a case is done for, and ammo afflicted in this way won’t begin to chamber.
Under-belling has problems too, though they generally have the, er, benefit of being catastrophically apparent (small “c,” as in nothing goes “boom”) right when they occur.
If your projectiles are actually jacketed (not just copper- or brass-colored), you can get away with a small flare, but clad, plated or lead bullets generally need a quite-detectable bell. This is mainly due to the tendency of their softer surfaces to catch on any imperfection, or tip off-axis in a shallow flare.
In and of themselves, these mishaps will do no harm. But if you run the ram of your press with such a misalignment present, you’re likely to crush or tear the case, shear or cut the bullet, and occasionally both. The “good” news, as we alluded, is that this results in a thoroughly, obviously unshootable round; the bad is that all the components are a loss, and especially if you tip the case and dump powder into the guts of your press. &^%$! *@#&!!
Obvious question: Which is better, slightly too much flare or too little? We always opt for the wide side, as its failures are mostly correctable with a proper Step Seven.
Our closing thoughts here relate to a completed round, but because they have gun-damaging, shooter-injuring consequences and start with the flaring step, they get an airing. Closing the flare sufficiently is a must-have sort of thing because even a correct flare, insufficiently crimped/closed, will stop a firearm hard. This happens because virtually all chambers taper, and a partially closed flare may enter well enough, but not fully seat against the shoulder of the barrel itself.

If the flare is open enough, the cartridge will probably not feed at all, and, if it does, it will not let the action close by a long chalk. This is actually a good thing, and easy to fix. If, however, it’s not quiiiiite closed, it makes an auto-loader vulnerable to an out-of-battery ignition.
That sounds bad because it is bad. Especially in polymer-framed firearms, it’s an end-of-gun event; you’re left hoping folks are just scared, and not actually hurt, because that can happen too. Flying metal, escaping gas, etc.—dangerous business, that.
We alluded to our preferred “fix” in Part 5—your own action-proving dummies. After you think your press is set, we suggest a small run of cartridges with no powder or priming. These have the virtue of being hand-cyclable in complete safety, and will save a lot of cussing down the line. The dummies should feed and extract without large variations in slide velocity as you run the action under hand pressure. Remember, too, that you aren’t wasting components here, either; one of these will allow you to salvage bullet and case in good condition if used properly. And every reloader should have one anyway.
This is an imperfect predictor of cycling under actual conditions because the force and speed of actual firing can’t be duplicated, but it’s well better than guessing. Another extremely wise test we borrow from match shooters is the “plunk test.” Take the barrel out of your unloaded pistol, and let a round drop all the way into the chamber. If the case mouth doesn’t engage the shoulder with a plunking sound, chances are good that dimensional problems with flaring closure exist (though there are other possibilities too). The round should fall back out of the chamber as well.
Once these move smoothly in and out of your action, you’re one step closer to producing the complete article.
A Note On Rifle Case “Flaring”
Most rifle cases require different procedures in this step of cartridge rebuilding. The neck of rifle cases is actually resized as a byproduct of de-capping (Step Two), but this does not mean that there’s no comparable Step Four.
Take a look here (from our friends at Midway USA), and you’ll see the classic implement for both jobs—a deburring and chamfering tool. Instead of flaring, the pointed end of this tool is placed in the rifle case mouth and rotated a few gentle turns. The ground steel edges actually cut away a small amount of brass (rather than bending it open), but the result is the same—a micro funnel that feeds the base of a new bullet into the case. This prevents shaving or other misshaping of the projectile, which is actually kind of a big deal. “Boat tailing” or other geometries have a big effect on rifle bullet accuracy, and they need to remain unaltered by the seating process (Step Six, as you may recall).
The alternate end of the tool has a pilot that goes in the case mouth as well, and guides an even gentler set of turns to uniform the outside of the neck. The goal here is only to remove any burrs. These burrs generally get kicked up during feeding collisions in a previous feed/chamber/fire cycle.
Over-application of either end is where beginning rifle reloaders generally go wrong. Both of these tasks require light application of the steel tool to the much softer brass case. Like many other aspects of reloading, a “feel” for this is acquired over time.
In the near term, a little magnification helps a lot: For deburring, you should not create a plainly visible “flat” on the otherwise 90-degree outer edge of the neck/case mouth. Just a revolution or two under light pressure will remove high burrs—don’t cut down to eliminate small gouges. Inside, a very slight flat—just breaking the 90-degree edge—is desirable, but in no case should it be more than one-half of the thickness of the neck. More cutting isn’t a catastrophe, but it will shorten case life and isn’t necessary.
The best gauge short of actual microscopy is not making that edge feel sharp: There should still be a perceptible “top” to the case neck.
Part 1 Part 2 Part 3 Part 4 Part 5 Part 6
Frank Winn has been studying arms and their relationship to tyranny, meaningful liberty and personal security all his adult life. He has been a firearms safety/shooting instructor for more than 20 years, and earned state, regional and national titles in several competitive disciplines.


